Showing posts with label Linux. Show all posts

how to preview glyphs and install bitmap font on linux

hello, welcome back to my blog. Today i wanna share something about font, there are bitmap font. before we go, font is displayable text character on your screen including how it looks, and size. so, what is bitmap font ?

bitmap font is font that producing pixel (a picture) from each letter and the image from the font is called glyphs, the bitmap font is not flexible as you thing i.e if you resizing to upscale it's degrade in quality. but, it's faster to load themselves than reguller image.

you can install bitmap font linux and reviewing them using xfd command, it will show you up everything character from what font are you view. bitmap font is usually for web programing or configuring bar as a panel for your desktop like lemonbar, dzen2, or anything that similar to that. But, sometimes you cannot see them like picture that i attach below.


Because some Linux distro's disabled them by default, and you can fix that by follow this step below "how to preview bitmap font on Linux" for example i will choose Siji bitmap font and trying to preview on my Linux system and let's go on!
installing font as user:
1. git clone https://github.com/stark/siji && cd siji
2. mkdir ~/.local/share/fonts
3. ./install.sh -d ~/.local/share/fonts
4. add this script to your start up
xset +fp /home/username/.local/share/fonts
xset fp rehash

installing font as root:
1. go to ~/.local/share/fonts/ and copy siji.pcf to /usr/share/fonts

enable preview bitmap font on linux :
1. sudo rm /etc/fonts/conf.d/70-no-bitmaps.conf
2. sudo fc-cache -f -v
3. done now you can check the font using this commad fc-list | grep "Siji" and if you success the result is like image below


4. now you can generate glyph code using xfd
xfd -fa siji and the result will be like this


If your system does not detect the font or not enabling bitmap font, xfd comment will displaying Dejavu - sans font like picture above on top.

And there it is, the short guide to enable or fix preview bitmap font on Linux. for more article please follow up this blog and stay tune. if you wanna ask something or appreciate my post just comment on comment section below, and don't forget to share to your friend or family to help spread good information. stay safe and healty, see ya on next article!

cara mengatasi "You can't disable GitHub Pages for this repository." saat ingin unpublish github web pages.

 hallo guys, apa kabarnya ? semoga sehat selalu ya dan terhindar dari virus corona. setelah saya lama tidak mengurus blog ini akhir nya saya memutuskan untuk kembali mengurus blog ini, pada saat saya tidak mengurus blog ini saya sedang mencoba untuk berpindah platform. tapi, ketika saya pikir pikir lagi untuk mengakhiri blog ini sayang juga dan akhir nya saya memutuskan bahwa saya ingin tetap disini saja dengan apa adanya ini. nah platform yang saya singgahi itu adalah SSG (static site generator), dan saya menghosting nya di github (github webpages). dan artikel kali ini adalah berkaitan tentang github web pages tersebut.

github pages adalah sebuah layanan yang disediakan oleh github dimana fungsi nya untuk merubah repositori github menjadi sebuah situs website yang dapat diakses seperti portofolio, project, documentasi, atau apapun itu yang ingin kamu tampilkan (bisa juga blog seperti saya waktu itu). yang mereka klaim kalian tidak membutuhkan database, server yang harus di konfigurasi sedemikian rupa, dan bahkan kalian yang tidak bisa atau tak tahu HTML pun bisa, lebih lengkap nya silakan kunjungi https://pages.github.com/ untuk informasi lebih lanjut.

lalu kita akan membahas bagaimana cara untuk meng-unpublish github page nya, ya karena penting jika sewaktu waktu halangan pasti akan datang yang dimana kita tidak bisa mengurus blog nya dan memutuskan untuk menutup blog tersebut untuk sementara waktu. dan kebetulan jika kalian mengalami error "You can't disable GitHub Pages for this repository" pas banget kalian datang ke blog yang tepat. baik kita langsung saja menuju caranya.


1. buka repository website kalian yang github.io kemudian klik settings seperti gambar dibawah ini


2. kemudian rename repository tersebut jadi apa aja bebas

3. jika sudah klik rename lalu scroll kebawah ke bagian "Github Pages" dan pada menu drop-down "branch"di bagian Source klik lalu pilih menjadi none (agar lebih jelas lihat gambar dibawah ini) jika sudah klik save

4. tunggu beberapa saat kira kira 1 - 5 menit kemudian coba akses website yang anda tutup tadi. maka hasil nya 404, baik anda mengetik dengan url lama atau url baru (nama repo baru) hasil nya pun tetap sama. 


nah baiklah, hal ini bisa menjadi opsi apabila sewaktu waktu kalian ingin mengaktifkan blog nya kembali. dari pada menghapus repository nya mending di unpublish saja. sekian apabila ada yang ingin kalian tanyakan tinggalkan saja di komentar. sekian dan terimakasih.

cara mengatasi Windows 10 tidak terdeteksi setelah menginstall Phoenix OS via USB

Hi guys, gimana kabar nya ? semoga sehat selalu ya dan pc nya juga sehat ya. Maaf jika kala dimana blog ini jarang update dikarenakan saya sibuk dengan RL yang menuntut, kali ini saya luangkan waktu untuk mencari bahan artikel dan research serta menulis artikel ini untuk kalian semua.

Game mobile sekarang yang lagi tren itu selain ML itu ada PUBG mobile, pastinya bagi kalian yang PC nya mid-end hingga high-end tentulah bisa menggunakan emulator dari tencent untuk memainkannya demi aiming yang sempurna dan nyaman. Lalu bagaimana dengan kalian yang pc nya low-end dan handphone nya low-end pula ? solusi nya adalah dengan mengintall Phoenix OS atau men-tweak dengan gl tool pada hp kalian dan lain sebagainya bagi user non-root, tapi sekarang disini saya gak akan membahas si androidnya ( bagi yang ingin mengetahui seluk beluk android silakan kunjungi blog saya yang mengupas android yaitu wanda4agustian.blogspot.com ) melainkan saya akan membahas tentang Phoenix OS nya terutama menjelaskan tentang cara mengembalikan Windows 10 yang hilang atau tidak terdeteksi setelah menginstall Phoenix OS melalui USB. bukan Windows 10 aja sih sebener nya mungkin windows yang lain juga bisa cuma kebetulan saya sedang menggunakan windows 10 dan laptop dan ponsel saya juga low-end makanya saya ingin sekali main PUBG mobile ini guys.

Ë‹Tipe laptop yang saya gunakan adalah Acer Aspire One 14 Z1402-3563 (core-i3, 2GB memory), BiOS-nya Legacy mode dengan tipe partisi Mbr. Baik mari kita langsug memulai caranya :

1. Booting laptop kalian menuju Phoenix OS kalian karena disini masih menggunakan nya untuk mengedit file GRUB nya.

2. Lalu jika sudah selesai booting dan sudah berada di Phoenix OS nya maka bukalah CZ-file manager.

3. Dan cari Partisi Dimana anda menginstall GRUB dari Phoenix OS itu terinstall lalu jika ketemu akan ada folder bernama "grub" (tanpa tanda petik dua), ciri - ciri dari folder GRUB Phoenix itu berisikan file seperti gambar dibawah ini.


4. Jika sudah ketemu buka folder tersebut dan pastikan isi file nya seperti gambar diatas kemudian cari file bernama menu.lst dan buka dengan TextEditor.

5. Kemudian kasih satu gap atau enter dibawah script ini initrd /PhoenixOS/initrd.img lalu tambahkan script ini
(pastikan windows terinstall di partisi pertama)

title Windows 10
rootnoverify (hd0,0)
makeactive
chainloader +1

serta apabila anda mempunyai 2 hardisk dan windows terinstall di hardisk ke dua maka gunakan script ini saja (pastikan windows terinstall di partisi pertama di hardisk ke dua)

title windows 10
map (hd0) (hd1)
map (hd1) (hd2)
rootnoverify (hd1,0)
makeactive
chainloader +1

6. Kemudian save file tersebut dan coba reboot jika keluar Windows 10 lalu pilihlah kemudian klik enter. Jika berhasil booting ke windows selamat anda telah sukses melakukannya


note : cara ini untuk jenis BiOS  dengan mode legacy dan tipe partisi hdd mbr, dan partisi drive nya NTFS. jika kalian mencoba di selain legacy dan mbr silakan saja tak ada salahnya :)

jika ada yang di tanyakan tinggalkan di kolom komentar agar kita berdiskusi bersama. saya harap agar kalian bisa dan selamat mencoba sekian terimakasih

cara mengatasi MTP device tidak terdetect atau tidak termount pada OS Debian

hi guys, apa kabar ? semoga sehat selalu yah. pernah gak sih kalian mengalami ketika usb di masukan terbaca di pc yang run Debian sebagai OS nya dan ketika menyambungkan ponsel android sebagai media transfer data atau tersambung sebagai mtp devices tetapi di pc tersebut tidak terbaca bahkan tidak termount padahal terdapat notifikasi MTP pada android kita ?
nah kali ini saya akan membagikan solusinya nih, asalkan distro yang kalian gunakan support dengan FUSE dan mungkin ada sedikit perbedaan. disini saya menggunakan Debian 9 sebagai OS pada pc saya jika ada perbedaan depedencies harap disesuaikan terhadap distro masing masing ya mungkin saja hanya beda nama packet, baik kita langsung saja ke caranya.

1. install terlebih dulu depedencies atau packet nya
#apt-get install libmtp-common go-mtpfs mtp-tools

2. lalu buatlah direktori untuk membuat mount point untuk ponsel android yang ingin kita gunakan, dan beri akses pada direktori tersebut
#mkdir /media/andromtp
#chmod 775 /media/andromtp

3. kemudian masukan ponsel mu dan mount melalui terminal

$sudo go-mtpfs -allow-other /media/andromtp

jika di ponsel mu ada notifikasi meminta izin seperti gambar dibawah ini klik izinkan lalu mount kembali melalui terminal


lalu di terminal akan terlihat gambar seperti dibawah ini

lalu buka file eksplorer seperti thunar dan coba klik andromtp apakah bisa sekarang ? jika bisa maka akan seperti gambar dibawah ini

pada gambar diatas saya membuat direktori dengan nama j5prime, perlu diingat sebelum mencabut ponsel android mu alangkah baiknya ikuti step nomor 4

4. untuk unmountin kita ketikan ini

$sudo umount /media/andromtp

5. agar kalian tidak menulis sudo go-mtpfs ........ lagi dan lagi maka ikuti langkah ini
$sudo visudo (tambahkan line ini)
user ALL=(ALL) NOPASSWD: /usr/bin/go-mtpfs -allow-other /media/andromtp
user ALL=(ALL) NOPASSWD: /bin/umount /media/andromtp

$vim .bashrc (tambahkan line ini dibagian aliases
alias mount-mtp='sudo /usr/bin/go-mtpfs -allow-other /media/andromtp'
alias unmount-mtp='sudo /bin/umount /media/androku'

kemudian anda bisa menjalankan nya tanpa mengisi password root dan dengan kalimat sedikit hanya dengan mengetikan
mount-mtp = untuk mounting ponsel android melalui terminal, dan
unmount-mtp = untuk unmounting ponsel android melalui terminal

note : pada visudo user diganti dengan nama user kalian di OS yang kalian pake

mudah bukan ? , seperti yang saya sebutkan ada sedikit perbedaan di beberapa distro untuk nama packet nya jadi keep-on-eyes yah btw kalo step mount dan unmount nya sama saja yang membedakan hanyalah masalah di packet nya tadi. jika ada yang salah mohon dikoreksi dan apabila ada yang ingin ditanyakan silakan komentar dibawah ini, jaga kesopanan agar tertib sekian terimakasih..

cara konfigurasi Bandwith management dengan queue tree di mikrotik

hi guys, gimana kabar nya ? sehat semua ya pastinya, kali ini saya akan membagi kan cara konfigurasi bandwith management dengan queue tree. kalo anak smk bilang cara setting atau konfigurasi queue tree, hal ini berguna untuk melimit paket supaya pemakain bandwith merata dan bagi yang mau hemat kuota bagi yang input nya melalui dari hotspot atau modem bisa juga :D

jangan lupa baca juga : cara menyambungkan hotspot androi menjadi input mikrotik

bagi anak smk konfigurasi ini adalah salah satu point penting saat penilain kejuruan, makanya saya men-share tips konfigurasi ini. umumnya agar semua kalangan bisa, baiklah tanpa banyak bicara langsung saja ke pembahasan.

1. login ke winbox agar dapat me-remote router nya
2. pastikan router telah tersambung ke internet dengan mensetting address dan gateway terlebih dahulu.
3. untuk memulai melimit bandwith, kita membuat dua mangle terlebih dahulu seperti langkah dibawah ini
  • masuk ke menu ip > firewall lalu pilih tab mangle dan klik add (+)
  • lalu buat mangle pertama dengan konfigurasi seperti ini
chain : forward
src. address : ip ether berapa yang akan kalian limit, misal ether 2 dengan ip 10.10.10.1/30 maka penulisan nya adalah 10.10.10.0/30
action : mark connection
new connection mark : user1
passthrought : centang
  • lalu klik ok.
  • dan buat lagi mangle kedua dengan menekan tombol add (+) masih di ip > firewall > mangle dengan konfigurasi seperti ini
chain : forward
connection mark : user1
action : mark packet
new mark packet : to-user1
passthrought : centang
  • lalu klik ok
4. untuk mangle sudah selesai, sekarang menuju queue tree nya. untuk queue tree kita juga membuat dua yaitu untuk upload dan download dengan konfigurasi seperti dibawah in
  •  klik pada menu queue > queue tree lalu klik tombol add (+) untuk menambahkan queue tree upload
  • dan lakukan seperti dibawah ini
name : up
parent : ether yang menjadi input misal wlan1 karena saya menggunakan hotspot android untuk menjadi input nya jika kalian dari isp maka isikan ether1
packet marks : to-user1
max limit : 512k atau sesuai kbm dan keinginan kalian
  • lalu klik ok
  • lalu klik tombol add (+) untuk menambah kan queue tree download dan lakukan konfigurasi seperti dibawah ini
name : down
parent : ether yang akan kamu limit bandwith nya misal mau ether2 ya isi kan ether2
packet marks : to-user1
max limit : 1024k atau sesuai kbm dan keinginan kalian
  • lalu klik ok
5. sudah selesai untuk konfigurasi queue tree nya langkah terakhir adalah uji coba nya, silakan kalian untuk streaming, browsing dll. Apakah indikator pada queue tree berjalan ? jik berjalan sepert gambar dibawah ini maka anda berhasil melakukan setting atau konfigurasi queue tree nya
nah, begitu cara setting atau konfigurasi bandwith management dengan queue tree. semoga bermanfaat, jangan lupa untuk tinggalkan komentar jika ada saran, masukan, trouble kita bahas bersama di komentar, dll. sekian dari saya sampai jumpa di tutor berikut nya sampai  jumpa dan terimakasih :D

how to fix pulseaudio no sound after headphone or headset plugged in - debian 8

hi, today i wanna tell you about fixing about how to fix pulseaudio no sound after headphone or headset plugged in. yes, i do this on debian and maybe work on your linux distro what you use now. ok, let's into the point
1. first run this command
cd /usr/share/pulseaudio/alsa-mixer/paths/
2. make a restore point
sudo cp analog-output-headphones.conf analog-output-headphones.bak
3. edit this file with this command
sudo nano analog-output-headphones.conf
scroll the down and find this "[Element Speaker] " (without quote) and change into look like this
[Element Speaker]
switch = on
volume = ignore
4. now make restore point again for fixed configuration
sudo cp analog-output-headphones.conf analog-output-headphones.fixed
5. and reboot

okey, this is how to fix pulseaudio no sound after headphone or headset plugged in. i hope this method work perfectly on your distro. any question ? leave command below. and i will say thanks !

how to show albumart on ncmpcpp

okey in this article, i wanna show you how to make your ncmpcpp look beauty like your girlfriend. that its how to show album arts on ncmpcpp, its possible to show casue you don't need again album text statement. but, now you can look album picture when your play music on ncmpcpp.
this my ncmpcpp

okey lets move into step.


1. copy this scritp into your ~/.ncmpcpp/config


% egrep -v '^#' .ncmpcpp/config
mpd_music_dir = "/home/user/Music/"

mpd_host = "127.0.0.1"
mpd_port = "6601"
mouse_list_scroll_whole_page = "yes"
lines_scrolled = "1"

visualizer_in_stereo = "no"
visualizer_fifo_path = "/tmp/mpd.fifo"
visualizer_output_name = "my_fifo"
visualizer_sync_interval = "10"
visualizer_type = "spectrum"
visualizer_look = "▋▋"

message_delay_time = "3"
playlist_shorten_total_times = "yes"
playlist_display_mode = "classic"
browser_display_mode = "columns"
search_engine_display_mode = "columns"
playlist_editor_display_mode = "columns"
autocenter_mode = "yes"
centered_cursor = "yes"
user_interface = "classic"
follow_now_playing_lyrics = "yes"
locked_screen_width_part = "60"
display_bitrate = "no"
external_editor = "nano"

main_window_highlight_color = "white"

progressbar_elapsed_color = "white"
progressbar_color = "black"

#progressbar_look = "▃▃▃"
progressbar_look = "─⊙ "

mouse_support = "yes"
header_visibility = "no"
statusbar_visibility = "no"

statusbar_color = "white"
visualizer_color = "white"
titles_visibility = "no"
enable_window_title = "yes"

now_playing_prefix = "$b"
now_playing_suffix = "$8$/b"

#now_playing_prefix = "$u$2"
#now_playing_suffix = "$2$/u$2"

song_columns_list_format = "(6)[]{} (23)[red]{a} (26)[yellow]{t|f} (40)[green]{b} (4)[blue]{l}"

color1 = "white"
color2 = "black"

song_list_format = " $5%l  $7%t $R$5%a "

#uncomment both statement's below if you want to display the albumart

execute_on_song_change="~/.ncmpcpp/art.sh"
song_list_format = "                               $2%t $R$5%a "

song_status_format = "$b$7♫ $2%a $4⟫$3⟫ $8%t $4⟫$3⟫ $5%b "
song_window_title_format = " {%a} - {%t}"

2. and copy this code and save as art.sh to ~/ncmpcpp and making that script is executable by use that command chmod +x art.sh

#!/bin/bash

#put this file to ~/.ncmpcpp/


MUSIC_DIR=/media/dante/deb/Sounds/ #path to your music dir

COVER=/tmp/cover.jpg

function reset_background
{
    printf "\e]20;;100x100+1000+1000\a"
}

{
    album="$(mpc -p 6601 --format %album% current)"
    file="$(mpc -p 6601 --format %file% current)"
    album_dir="${file%/*}"
    [[ -z "$album_dir" ]] && exit 1
    album_dir="$MUSIC_DIR/$album_dir"

    covers="$(find "$album_dir" -type d -exec find {} -maxdepth 1 -type f -iregex ".*/.*\(${album}\|cover\|folder\|artwork\|front\).*[.]\(jpe?g\|png\|gif\|bmp\)" \; )"
    src="$(echo -n "$covers" | head -n1)"
    rm -f "$COVER"
    if [[ -n "$src" ]] ; then
        #resize the image's width to 300px
        convert "$src" -resize 300x "$COVER"
        if [[ -f "$COVER" ]] ; then
           #scale down the cover to 30% of the original
           printf "\e]20;${COVER};70x70+0+00:op=keep-aspect\a"
        else
            reset_background
        fi
    else
        reset_background
    fi
} &

3. in the art.sh look into MUSIC_DIR line and set the variable to your music dir. example:

 MUSIC_DIR=/media/dante/deb/Sounds/

4. assure, you have a album art picture in your music dir . i suggest, to make sub folder for your music with same album. like this, and dont forget to rename your picture album to cover.jpg
5. the dependecies you must have is mpc and imagemagick. at here i use 6601 port on my mpc and mpd, so you can change it to your port how much you use
and bingo, if you got flick on urxvt just adjust the geometry.

yeah that its, if you have question, comment , and thanks, just comment below. lets disqus.

[SiMPLE WAY] cara menghubungkan / connect wifi melalui terminal di linux

hi sobat, apa kabar ? semoga sehat semua ya. oke malam ini saya akan memberikan tips tentang menghubungkan wifi atau connect wifi melalui terminal dengan cara yang simple pastinya. hal ini berguna ketika anda sedang menggunakan linux kalian pada mode TTY atau non-gui atau bahkan gui tapi menggunakan window manager tanpa ada tray icon wifi alias tidak menginstall panel seperti tint2, gnome-panel, dll. oke berikut langkah nya.

1. pada TTY mode atau terminal ketikan teks di bawah ini
nmcli dev wifi connect ESSID_NAME password ESSID_PASSWORD

dengan catatan :
ESSID_NAME itu berarti nama dari wifi kamu atau biasa disebut SSID
ESSID_PASSWORD itu berarti password dari nama wifi kamu atau SSID kamu

untuk melihat jaringan wifi disekitar mu bisa dengan mengetikan.
nmcli dev wifi

2. tunggu sebentar hingga proses penyambungan selesai.

3. jika connect cek dengan mengetikan ini
iwgetid -r
nanti bakalan muncul nama wifi atau ssid yang telah anda sambungkan tadi..

oke begitu aja guys, semoga bermanfaat. sekian terimakasih...

how to lemonbar configuration

today, i wanna tell you how to configuration lemonbar or lemonbar configruation. lemonbar (formerly known as bar) is a lightweight bar entirely based on XCB. Provides full UTF-8 support, basic formatting, RandR and Xinerama support and EWMH compliance without wasting your precious memory. so lets begin.

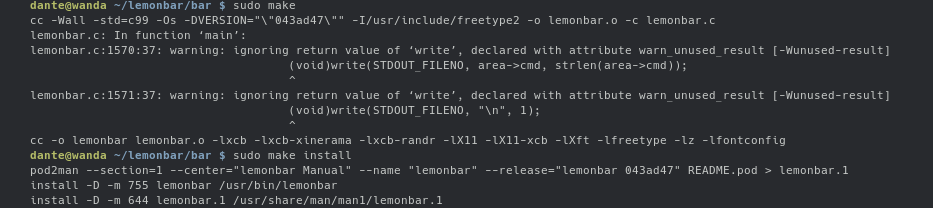
to install lemonbar and load font on lemonbar you can go here > installing lemonbar and load font on lemonbar

remember lemonbar is statusbar, not panel. so, its not any taskbar. just print the output.

we wanna fetching information about :
1. date
2. ssid of wifi
3. batery
4. sound level
5. clock
6. window active status
7. music
8. icon for this item

1. fetching the date
 we would use date command to print out that.

date '+%d %b' #this print day number of the month and month

2. ssid of wifi
we would use iwgetid command to make simply setup but powerfull. let's se bellow

iwgetid -r  # it just print the ssid no other

3. battery
its important to avoid the low battery status and urged you to chare your laptop. i use acpi command to make it simple

acpi | cut -d, -f2 #its only  print battery level

4. sound level
sound level can print into two type of output. can be proggesbar and can be text. if you wanna proggressbar use mkb and if you want text lets follow me.
we use amixer command.

amixer get master | grep "Front Left:" | awk '{print $5}' | cut -d [ -f2 | cut -d ] -f1 # its only print sound level

5. clock
as same as with date we use date command

date '+%H:%M'

6. window active status
window active status only print the name of focused window not like panel clickable and print the name. we use xdotool command

xdotool getwindowfocus getwindowname

7. music
we use mpd and mpc command to print the listening music status

mpc -p 6601 -f "%artist% >> %title%" | head -1

8. icon for this item
you must install siji font to get icon for this ouput and to make more beautiful setup of bar.
if you already install that font let's follow

run this command to get the glymphes code
xfd -fa Siji
and choose icon what you want to print at your bar setup for example:
the glymphes code of music icon is : 0x00e05c to print on the bar just run like this
echo -e "\ue05c" | lemonbar -f "Siji-8" -p #this print with bar standalone not fetch with all

PRINT THEM ALL ONLY WITH LEMONBAR
this setup will be eat more reosources of ram, coz you will run two lemonbar to get bar on right and left. but, not much eat resource. on this setup we would use bash script, if statement, case statement, while true do, and function like a C. oke let's follow.

make bash script like this
1. for status item of lemonbar

$vim statusquh

#!/bin/bash
#arg
#ndow="$(xdotool get_desktop | grep 0)"
#inf="$(mpc -p 6601 -f "%artist%" | head -1 | wc -l)"
#wifikek='iwgetid -r | wc -l'
#bat='acpi -i | head -1 | cut -d, -f1 | cut -d: -f2 | sed 's/ //g' | grep "Charging" | wc -l'


case $1 in

 window)
 ndow=`xdotool get_desktop | wc -l`
 if [ $ndow -eq 1 ]; then
 xdotool getwindowfocus getwindowname
 fi
 ;;

 musik)
 inf=`mpc -p 6601 -f "%artist%" | head -1 | wc -l`
 if [ $inf -eq 1 ]; then
 mpc -p 6601 -f "%artist% >> %title%" | head -1
 else
 echo not playing
 fi
 ;;

 volume)
 amixer get Master | grep "Front Left:" | awk '{print $5}' | cut -d [ -f2 | cut -d ] -f1
 ;;

 wifi)
 wifiqu=`iwgetid | wc -l`
 if [ $wifiqu -eq 0 ]; then
 echo "off"
 else
 iwgetid -r
 fi
 ;;

 infobat)
 bat=`acpi -i | head -1 | cut -d, -f1 | cut -d: -f2 | sed 's/ //g' | grep "Charging" | wc -l`
 if [ $bat -eq 1 ]; then
 echo "Charging"
 else
 echo "Discharging"
 fi
 ;;

 desktop)
 des=`xdotool get_desktop | wc -l`
 if [ $des -eq 1 ]; then
 xdotool get_desktop
 fi
 ;;

 batre)
 acpi | cut -d, -f2
 ;;

 jam)
 date '+%H:%M'
 ;;

 tanggal)
 date '+%d %b'
 ;;

esac

save this code and move into /usr/local/bin/ with this command

 sudo mv statusquh /usr/local/bin

2. now then, for left lemonbar

$vim kiri

#!/bin/bash

#colour
red="#D24D57"
case $1 in
semua)
nda() {
    echo -e "\ue0b1" && statusquh window
}

ndi() {
    echo -e "\ue224" && statusquh infobat
}

ndu() {
    echo -e "\ue10f" && statusquh wifi
}

nde() {
    echo -e "\ue107" && echo Hana
}

while :; do
kok="$(nda)"
kek="$(ndi)"
kuk="$(ndu)"
kik="$(nde)"

echo $kok $kek $kuk $kik
sleep 1
done
;;
esac

save it, and move into /usr/local/bin

3. and this for right lemonbar

$vim kanan

#!/bin/bash

#colour
red="#D24D57"
case $1 in
semua)
nda() {
    echo "%{F$red}TGL:%{F-}" && statusquh tanggal
}

ndi() {
    echo "%{F$red}JAM:%{F-}" && statusquh jam
}

ndu() {
    echo "%{F$red}VOL:%{F-}" && statusquh volume
}

nde() {
    echo "%{F$red}BAT:%{F-}" && statusquh batre
}

while :; do
kok="$(nda)"
kek="$(ndi)"
kuk="$(ndu)"
kik="$(nde)"

echo $kok $kek $kuk $kik
sleep 1
done
;;
esac

save it and move into /usr/local/bin

5. for lemonbar to print out that

$vim barkiri

#!/bin/bash
kiri semua | lemonbar -p -f "Clean-10" -f "Siji-8" -g 1366x24

save it and move into /usr/local/bin

6. for second lemonbar to print out that

$vim barkanan

#!/bin/bash
kanan semua | lemonbar -p -f "Clean-10" -g 250x24+1116+0

7. testing time !
for testing. run kiri and kanan like this

$barkiri
$barkanan

the result is like this

if you want find much more about lemonbar configuration or my dotfile just visit my github page > dante08
oke, i hope you can do about configuration lemonbar. only that for me, littlebit about lemonbar especialy about lemonbar configuration. so thank you much.

How to run ifconfig or etc without sudo or su

 Hasil gambar untuk ifconfig command not found\


hi guys, welcome back at wandapcguide. to day i will tell and explain with you about linux especialy for you if debian and CentOs user. if you manage your network or practice about configuration with debian especialy high vocational. sure, its must login throught tty mode and loggin as root to simply you at practice and if you loggin as user and you will run ifconfig or iwgetid or etc you got an error its say unknow command for ifconfig and its can be do in superuser alias root. and than i'd like to tell you to fix ifconfig command not found lets follow this instruction.

1. open your terminal and type
$export PATH:$PATH:/sbin
2. and type
$ifconfig

its be done, but if you close the terminal it will reset these setting. best solution to take them into the autostart program. lets follow the instruction:

1. create your own executable file or bash script file
2. add #!/bin/bash on header at your executable file or bash script file
3. add this command to your executable file or bash script file
 export PATH:$PATH:/sbin
4. add your window manager command or DE command on footer at your executable file or bash script file like this

#!/bin/bash
#for ifconfig or etc
export PATH:$PATH:/sbin
#starting GUI interface
2bwm

5. save it, and copy the file to /usr/local/bin.
6. add to your desktop entries file at /usr/share/xsession/ like this

[Desktop Entry]
Encoding=UTF-8
Name=2bwm
Comment=Binary space partitioning window manager
Exec=/usr/local/bin/yourfilebashscript
Type=Application

7. and try restart your display manager
8.  and open terminal and type ifconfig
9. and tara!! bingo!

if you fail adding into this, try other method  about adding autostart program, sure its done. i feel enought, i hope you can. if any comment, feedback or etc leave comment bellow. see you!

how to load font on lemonbar

hi guys, today i wanna tell you about linux again especially, for you which happy with your desktop or linux rice. so, i want to tell about lemonbar.
lemonbar (formerly known as bar) is a lightweight bar entirely based on XCB. Provides full UTF-8 support, basic formatting, RandR and Xinerama support and EWMH compliance without wasting your precious memory.

many people asked how to load font on lemonbar or why i was load font in lemonbar and show could not load font blabla. today i give your solution to load font on lemonbar. lets to step;

1. first you must completed and install the deppedencies for lemonbar
$sudo apt-get install libxcb-xinerama0-dev
$sudo apt-get install libxcb-randr0-dev

2. clone this repository and take in into the folder
$git clone https://github.com/krypt-n/bar && cd bar

3. install apt-file to search additional deppedencies
$sudo apt-get install apt-file

4. and try to compile with make ($sudo make) if you found log error like below follow step 5
5. search the file what they need the picture above say, they need Xlib-xcb.h so we use apt-file to search main deppedencies of Xlib-xcb.h
$apt-file search Xlib-xcb.h

6. if already search and show like this picture bellow
you must install the deppedencies like red tag on picture above. so, you must install libx11-xcb-dev
$sudo apt-get install libx11-xcb-dev

7. clear ?, back into bar folder and compile with make like this
$sudo make
8. and install with make like this
$sudo make install


and then its my lemonbar. i use HIVNotRetro and Hack font, you can pick your font name from lxappearance or other tweak tool

okey, thanks guy. if you harder to try, found other command, success, or etc please leave comment bellow. we disqus together.

how to reduce screen or decrese screen brightness become smoothly on linux


hi guys, today i wanna tell you how to reduce screen or decrese screen brightness become smootly on linux. i post this article because since i change my linux using some windows manager and i don't know how to change the brightness. so, i think "mm, what i done. if i change brightness on terminal ? " so i tried to share on some search engine and i found the answer. so, i try and it done. and my screen become reduce smoothly now. its why i wanna share with you..
oke, go to the step now!

1. open your terminal.
2. type xrandr -q | grep " connected"
3. it will gives you the output as eDP1 connected 1366x768+0+0 (normal left inverted right x axis y axis) 309mm x 173mm4. There eDP1 Stands for your display . so now you have to do as type: 
xrandr --output LVDS1 --brightness 0.5

note: there 0.5 stands for brightness and it ranges from 0.0 to 1.0 . 0.0 -> Full black .so you have to choose the required value of brightness .

 oke its done. i hope its can work for you, if success, feedback, and etc please leave command bellow..

how to install or build mpdviz


hi guys, how are you today ? i hope youre fine! , today i wanna tell you how to install or build mpdviz on ubuntu based. its means, this is work on ubuntu based distro's like linux mint, xubuntu, elementary, and maybe work also on debian based.mpdviz is stand alone mpd visualizer for linux, mpdviz is use golang ( go ) for their language. so, you must install golang to install mpdviz. but, dont worry i can explain you how to install mpdviz right now. just follow this step.

1. open terminal and type this command below and dont close terminal until you done all proccess in this step
git clone https://github.com/lucy/mpdviz.git

2.  type this command below
# apt-get install golang cl-fftw3 # install Go language and fftw3

3. create folder /go/src/ to your ~/ and add this command to your .bashrc
export GOROOT=/usr/lib/go
export GOPATH=$HOME/go
export PATH=$PATH:$GOROOT/bin:$GOPATH/bin

4. back to terminal and type on terminal
source ~/.bashrc

5. type it on previous terminal.

user: $ mkdir temp
user: $ cd temp
user: $ pkgname=mpdviz
user: $ pkgver=0.4.2
user: $ pkgrel=1
user: $ pkgdesc='Standalone console MPD visualizer'
user: $ export arch=('x86_64' 'i686' )
user: $ export url='https://github.com/neeee/mpdviz'
user: $ license=('MIT')
user: $ makedepends=('go')
user: $ depends=('fftw')
user: $ export options=('!emptydirs')
user: $ export _gourl='github.com/neeee/mpdviz'
user: $ export srcdir="$PWD"
user: $ export PKG_CONFIG_PATH=/usr/lib/pkgconfig
user: $ export GOPATH="$srcdir"
user: $ export PATH=$PATH:$GOPATH/bin
user: $ go get -u -d -v "$_gourl"
user: $ cd "$srcdir/src/$_gourl"
user: $ git checkout -q tags/$pkgver
and dont close the terminal

6. and then open your file manager and navigate to the ~/temp/src/github.com/ folder

7. copy folder lucy and mattn folder inside ~/temp/src/github.com/ folder and copy into root folder like this /usr/lib/go/src/github.com/ (if github.com not create on /usr/lib/go/src/ you can create it.)

8. copy go-fftw folder inside ~/temp/src/github.com/lucy/ and copy to the ~/go/src/

9.go back terminal and type cd ~/mpdviz

10. and type go build

and see what happend ! if successful you not see any log on terminal, and if you look any log on terminal its reverse..
i hope this method can help you, and i hope you done with follow this step. and if any error, feedback, and youre done leave command bellow. thanks !

how to change lightdm and default wallpaper of WM background using mate desktop

hi guys. now, i wanna tell you to change background of lightdm (if you use it haha) and use mate desktop. its begining, because i think "how to change it? with manualy mode, not GUI.?!" so, its not trhought GUI mode. but, this is use the command. and then i will explain how is it.. lets follow this step.

1. first prepare your wallpaper, what you want to applied for background and put in home dir.

2.open terminal and type command below

$cd /etc/lightdm/
# -your favorite text editor- lightdm-gtk-greeter.conf

3. and fill background input with your background file
background = /path/dir/*.jpg or background = /path/dir/*.png
example: background = /home/es-cendol/bg_lightdm/1.jpg

4. its could change user image too, fill at default-user-image input with your avatar.
default-user-image = /path/dir/*.png
example: default-user-image = /home/es-cendol/dNTE.png

5. save it

6. restarting your lightdm, type command bellow
$sudo service lightdm restart

7. tarraa... bingo..

note : this method i tested at ubuntu mate 16.04. so, why you not try at your mate ?.

one more, its could change window manager wallpaper at your desktop. so, you dont need feh, or etc and you dont need put in rc.local to change wm wallpaper; its, dont need. i've been tested with some Window manager like 2bwm, openbox, and pekwm. maybe its done so on i3wm and other wm.
thanks for visit and practice. fail or not, feedback, and etc leave comment bellow, i hope you can do this method and i hope this method is usefull for you.

how to install googler on linux : google in your terminal


hi guys, now i wanna tell you how to install googler on ubuntu based. "googler is power tool to google (web & news) and google site search from the command line. it show the tittle, URL and abstract for each result" - (github.com/jarun). googler is leightweight to monitoring your web in googler without open your browser. but, googler is stay need a connection to search result. googler is available on :
- AUR
- Homebrew
- Debian
- Ubuntu
- Ubuntu PPA

but, here i  wanna explain to build googler from source. follow the step.

1. download the package at here
git clone https://github.com/jarun/googler/

2. change your self into that directory
cd googler/

3. and then run it to install
sudo make install

4. and tara.. try running googler with your keyword
example : $ googler facebook

that its the step i hope you successfull in try this step. ok thank you so much..

courtesy of github.com/jarun

how to fix Cannot Execute which bash : No such file or directory


hi guys, i wanna tell you something about linux. you maybe not strange if you in linux run as root. but if you meet the error which run su and show the log (example) ' Cannot Execute which bash : No such file or directory' what do you thing. ?

okey, here. i wanna give the solutions about these error, lets follow the step.
- first open your terminal
- use favorit text editor, i use vim for text editor here.
- then type,
$sudo vim /etc/passwd
- and look
root:x:0:0:root:/root:
- if root:x:0:0:root:/root:which bash . change into
root:x:0:0:root:/root:/bin/bash
- save  this file as same name do not change !
-  and try to run su and and type your password. tarraa..

this problem as same as with Cannot Execute bin/bash : No such file or directory. so, look and search with same error you do.
thanks i hope this can help you.. :D 

how to install ncmpcpp from source

hi guys, now i wanna tell you how about compile or install or build ncmpcpp from source. actualy, you can install from PPA or your repository. but, if newest or latest ncmpcpp its not able in your repository what are you doing ? so you must update or compile from source, right?.

oke first you need gcc and g++ its used to compiling. and you must install it
in ubuntu just type
- apt-get install gcc g++
and then you need some depedencies to build ncmpcpp
this is the list of depedencies, you can use apt-get install, your synaptic, and install manualy like this.
-lboost_filesystem
-lboost_system
-lboost_locale
-lboost_program_options
-lboost_regex
-licuuc
-licudata
-lboost_thread
-lmpdclient
-lreadline
-lpthread
-lncursesw
-ltinfo
-libmad0-dev libmpg123-dev libid3tag0-dev 
-libflac-dev libvorbis-dev libopus-dev 
-libadplug-dev libaudiofile-dev libsndfile1-dev libfaad-dev 
-libfluidsynth-dev libgme-dev libmikmod2-dev libmodplug-dev 
-libmpcdec-dev libwavpack-dev libwildmidi-dev 
-libsidplay2-dev libsidutils-dev libresid-builder-dev 
-libavcodec-dev libavformat-dev 
-libmp3lame-dev 
-libsamplerate0-dev libsoxr-dev 
-libbz2-dev libcdio-paranoia-dev libiso9660-dev libmms-dev 
-libzzip-dev 
-libcurl4-gnutls-dev libyajl-dev libexpat-dev 
-libasound2-dev libao-dev libjack-jackd2-dev libopenal-dev 
-libpulse-dev libroar-dev libshout3-dev 
-libmpdclient-dev 
-libnfs-dev libsmbclient-dev 
-libupnp-dev 
-libavahi-client-dev 
-libsqlite3-dev 
-libsystemd-daemon-dev libwrap0-dev 
-libcppunit-dev xmlto 
-libboost-dev 
-libicu-dev

next, you can download ncmpcpp source from here if already downloaded you can exstrack this file.
and then, goto ncmpcpp extacted folder, open terminal and type
> ./configure
if you not see any error next type
> sudo make
if you not see any error next type
> sudo make install
wait untill proccess done, if done check with run ncmpcpp -v in terminal and the version of ncmpcpp change into 0.7.7 you have already done to compiling ncmpcpp from source. happy singing with ncmpcpp. :D

note :
if you see error, check again your depedencies, log error,compiling tool and makefile missing.

cara mengatasi eror mounting partisi ntfs di linux

hay sobat, kali ini saya ingin berbagi tips lagi nih tentang partisi terutama yang melakukan dualboot windows 10 / 8 dan linux.
dualboot itu memasang dua OS atau lebih pada satu perangkat, seorang linuxer melakukan dualboot mungkin karena dia juga bermain game,seorang pelajar atu mahasiswa yang kebanyakan prosedur pembelajaran menggunakan OS windows atau bahkan seorang linuxer yang juga melakukan hal lain di windows seperti melakukan sebuah project atau lain-lain. jika anda melakukan dualboot linux dan windows 10 dan 8, pasti merasakan booting yang sangat cepat dan apabila kalian membuka partisi windows di linux nya menemukan eror "failed to mount *namapartisi  kalian*".


nah hal ini akan saya bahas di sini. hal ini dikarenakan partisi dari aktivitas si windows belum sepenuh nya shutdown makanya jika anda booting di windows terasa cepat mungkin sekisar 15 detik. marilah kita langsung saja menuju step nya..
1. hidupkan perangkat kalian dan bootinglah ke windows.
2. sudah masuk windows ? lalu buka control panel di small view dan klik power options
3. klik di choose what the power buttons do
4. lalu klik change setings that are  currently unavailable
5. lalu uncentang turn on fast startup (recommended)
6. lalu klik save changes

lalu lakukan shutdown pada windows jika sudah coba hidupkan kembali perangkat dan booting ke linux. sudah selesai booting linux nya ? coba buka file manager dan klik partisi windows nya seperti local disk E atau D dan tara..
selamat jika tidak ditemukan eror berarti anda telah berhasil melakukan cara diatas, jika belumberhasil juga ikuti cara di bawah ini

1. booting ke windows nya
2. sudah selesai booting ? lalu buka cmd lalu di run administrator
3. dan ketik powercfg /h off

note :
setelah melakukan ini booting ke windows akan terasa lama ya sekitar 50 detik
cara kedua harus melakukan cara yang pertama dan apabila cara pertama tidak berhasil baru lakukan cara kedua

begitu saja dari saya, semoga bermanfaat. sekian terima kasih.

cara membagi partisi untuk dualboot linux.

hay sobat, kali ini saya mau berbagi tips seputar dualboot linux sob. pasti tau kan dualboot itu apa ? kalo belum tau, dualboot itu memasang dua OS atau lebih pada perangkat komputer. bisa linux yang di dualboot bisa windows, atau bahkan linux dan windows. dan kalian pasti bertanya tanya seputar pembagian hardisk atau partisi nya, nanti kalo dualboot hardisk buat windowsnya atau local C nya ke ganggu gak ? , kalau dualboot harus di format habis ya partisi nya ? , kalau dualboot bisa bikin hardisk rusak ya ?. pertanyaan tersebut sering kali muncul. namun saya akan menjawab pertanyaan tadi. pertanyaan pertama mengganggu local C sih tidak, pertanyaan kedua bisa iya bisa tidak kalau tidak saran saya pakai format hardisk MBR nanti tinggal di extended saja partisi nya (bagai mana ? nanti akan kita bahas dibawah), dan pertanyaan ketiga itu sih tergantung sih pengguna jika sering dimati paksa atau shuttingdown perangkat tak normal atau pengguna komputer yang sering listrik padam mendadak alias tidak di pasang UPS mungkin bisa saja rusak. oke sudah bisa memahami kan ? sekarang kita akan ketopic bahasan yaitu cara mebagi partisi untuk dualboot linux. simak cara nya dibawah ini

bahan bahan
minitool partition wizard
sebuah hardisk yang cukup ruang
dan perangkat anda (ex. laptop, komputer, netbook)

tahap tahap
1. download dulu minitool partition wizard nya
2. jika sudah di download jadikanlah bootable recomended sih di CD (jika mendownload yang file .iso jika .exe langsung tancap saja :D )
3. lalu masukan ke cdrom dan booting perangkat anda ke CD/DVD nya
4. sudah selesai booting ? jika sudah ikuti step ini

    a. jika anda mempunyai sebuah ruang yang bertulis kan unlocated space maka buat lah partisi unlocated tadi, cara nya klik kanan partisi yang unlocated tadi lalu pilih create dan pilih size yang anda butuh kan untuk dualboot. jika tidak ada yang unlocated atau sudah menjadi local disk E,D,F dst maka anda bisa mem-extended nya dengan cara dan catatan sisa local disk nya harus mempunyai free yang cukup untuk melakukan partisi untuk dualboot nya dan cara nya adalah klik kanan local disk E, D, F dst atau terserah anda yang penting  memadai untuk partisi linux atau dualboot lalu jika sudah diklik kana pilih extended dan tentukan size yang anda butuh kan untuk membuat partisi dualboot tadi.
    b. jika sudah klik apply dan tunggu beberapa saat hingga proses selesai

5. reboot dari minitool partition wizard dan jika ingin melanjutkan menginstal ayok kita lanjutkan :D
6. pada saat install linux dan ingin dualboot saat masuk ke pembagian partisi pilih somethings else atau pada distro debian pilih partition manualy / manual
    a. pada linux urutan partisi nya yaitu
    - /dev/sda1
    - /dev/sda2
    - /dev/sda3
    - /dev/sda4
    - /dev/sda5 dan seterusnya
masih ingat jika anda membuat ukuran untuk partisi dualboot nya berapa ? jika masih pilih ukuran nya yang dibutuhkan contoh linux mint 17.1 = 18gb untuk root dan home nya. nah anda pilih lah ukuran yang sekiranya cukup untuk linux nya (ingat jangan local disk tetapi partisi yang baru yang anda buat di minitool tadi atau hasil extended tadi) jika lebih cukup ya bagus lah untuk swap kita hanya mebutuhkan partisi sebesar 2 x besar RAM yang kita gunakan. sudah paham ? jika paham? lakukan lah. saran saya pahamin dulu. baru lakukan
    b. lalu jika sudah klik next / install untuk melanjutkan instalasi nya

note : saat melakukan pembagain atau mem-extended partisi anda bisa me-undo nya jika anda ada yang salah seperti kurang gede size nya atau tidak cukup sizenya untuk requitment partisi pada linux atau windows.

oke sekian dari saya, terimakasih semoga bisa dipahami. untuk lebih silakan berkomentar untuk kita bahas bersama sama.

cara mengatasi windows 10, 8.1, 8 yang mengalami windows boot manager eror saat dualboot linux

hay bray, balik lagi nih ane. kali ini ane mau share cara mengatasi windows 10, 8.1, 8 yang mengalami windows boot manager eror saat dualboot linux nih.
ceritanya ane kan install ulang windows nya mau up ke windows 10. udah selesai install windows nya, ane update grub di linux ane yaitu linux mint, nah terus mau buka windows nya eror bacaan nya windows failed to start blablabla.
setelah ane brosing dan kreasikan. ane dapa cara nya bray. penasaran ? yuk mari simak dibawah ini.

langkah-langkah
1.jika sudah ada linux nya. silakan update grub nya terlebih dahulu.
2.jika sudah di update grubnya restart dan kembali ke linux yang kamu gunakan.
3.jika linux sudah selesai booting buka terminal dan install boot repair pada linux dengan ketikan kode dibwah ini
sudo apt-add-repository ppa yannubuntu / boot-repair
sudo apt-get update
sudo apt-get install boot-repair atau sudo apt-get install ubuntu-boot-repair
4. jika sudah terinstall buka boot repair nya melalui terminal atau aplication menu.
5. klik recommended repair
6. tunggu hingga proses selesai. dan reboot device mu.
7. jika sampai di pemilihan os di grub dan mau masuk ke windows nya pilih "windows recovery enviroment (loader)" dan tara.. anda telah masuk ke windows nya :D

note : 1. jika kalian menggunakan turunan arch linux, silakan download atau lakukan penginstalan sesuai distro anda
       2. kenapa windows 7 (loader) nya eror mengkin ada file yang rusak, atau anda telah melakukan update grub yang memrlukan akses partisi terpisah ex. manjaro

ngokeh, begitu saja dari saya. semoga bermanfaat dan have a nice day.

Search This Blog

Powered by Blogger.

About Us

Nama Blog

All About PC

Blog ini hanya membahas tentang pc, jika ada yang lain maka label atau tag nya saya taroh di lain-lain. mari belajar via internet :D

Earn Bitcoin with EZ click, no scam! TESTED BY ME

Advertisement

Formulir Kontak

Name

Email *

Message *